

How To Finish An Embroidery In The Hoop
- Melissa Galbraith
- Mar 28, 2021
- 2 min read


I finish all my embroideries in the hoop. This includes a closed back and a sawtooth hook so that they can be hung like a picture frame. Finishing the back of a hoop is optional and adds a nice finished look to the piece. Here's how we'll finish the Stained Glass Sampler embroidery in the hoop. Get the pattern here and stitch along with us. Watch the video and check out the step-by-step tutorial below.
Video Tutorial:

To finish an embroidery in the hoop, you'll need:
- a finished embroidery in a hoop
- felt
- needle
- thread
- pen
- scissors
Step-By-Step Tutorial:
1. Trim the fabric to 1-inch from the edge of the hoop.


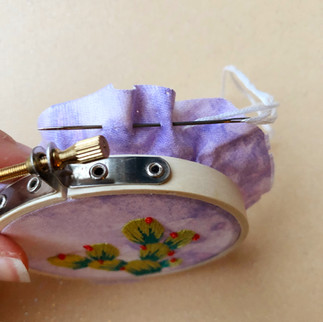


2. Use the running stitch to gather the fabric tightly on the back side of your hoop. After going all the way around the fabric, gently tug the running stitch so that the fabric gathers. Then knot the thread.

3. Next, use your embroidery hoop to outline a circle onto your felt.

4. Using scissors, cut the felt slightly inside the circle drawn based on the outline of your embroidery hoop.

5. Using needle and thread, attach the sawtooth picture hanger to the felt. If you have a label or want to add something stitched to the back of your hoop back, now is the time to do that.

6. Align the felt backing to the back of your embroidery and hold in place with sewing pins.


7. Using the whip stitch, attach the felt backing to the back of your embroidery.
***Disclaimer: This post contains affiliate links. Should you chose to purchase an item, I may receive a small portion of the sale.


Comments