

10 Line Stitches to Use for Filling Spaces in Hand Embroidery
- Melissa Galbraith
- Oct 21, 2025
- 9 min read


Picking out embroidery stitches for a project can be like picking out thread colors. Sometimes you know exactly what you want to use and other times you're not really sure.
Everyone picks out colors and stitches differently. When I embroider, I think in textures. I think about what texture the thing I'm embroidering is in real life. Then I think about what stitches make a similar texture. Once I have a few stitches in mind, I think about how the project is going to be used and where I'll be stitching. For example: if I was embroidering the sleeve of a jacket, it might be hard to get into certain spaces and long stitches might get caught on things when the jacket is worn. But if I was stitching a decorative embroidery that was being hung on the wall, the stitch length wouldn't matter as much.
There is such a wide variety of stitches that sometimes we place certain stitches into categories: decorative knots, line work, and filling. Then it can be hard to think of them for anything else. But many embroidery stitches cross categories and have a variety of uses. You can use quite a few stitches to outline and fill a space when embroidering. Here's 10 line stitches you might not have thought to uses as filling stitches.
10 Line Stitches to Use for Filling Spaces

1. Back Stitch
The back stitch creates a line that is made up of short stitches. Rows placed close together can be used to fill spaces of varying sizes. When the back stitches are are off-set in each line so that the fill looks like a brick wall this is referred to as the brick stitch. The brick stitch is a specific pattern of back stitch filling.
How to embroider the back stitch:
Full video tutorial


Begin by bringing the needle up through the fabric, from the back of the fabric to the front, about ¼ an inch away from the start of the line to be stitched.
Then, bring the needle back down at the end of the line, filling in the short space.
From underneath the fabric, space the needle out the length of your desired stitch (~1/4 inch or less) and pull the needle up through the fabric.
Then bring the needle back down through the fabric at the end of the previous stitch. Continue until the desired line length is formed.
When filling, start at either the bottom or top of the shape and add lines next to the first row stitched.

2. Split Stitch or Split Back Stitch
The split stitch and split back stitch both create a line where the stitches are connected by the thread next in line splitting it apart. Some people will might argue that these stitches look completely different, but I think they're basically the same stitch just done differently. Personally, I like the split back stitch better, because I think it's easier and offers more control of placement and the thread.
How to embroider the split back stitch:
Full video tutorial


Begin by bringing the needle up through the fabric, from the back of the fabric to the front, about ¼ an inch away from the start of the line to be stitched.
Then, bring the needle back down at the end of the line, filling in the short space.
From underneath the fabric, space the needle out the length of your desired stitch (~1/4 inch or less) and pull the needle up through the fabric.
Then bring the needle back down through the fabric in the middle of the previous stitch, splitting the thread apart. Continue until the desired line length is formed.
When filling, start at either the bottom or top of the shape and add lines next to the first row stitched.

3. Stem Stitch
The stem stitch looks like a coiled rope. It is great for stems and outlining, as its name would suggest, but you can also use it to fill in spaces too. I find that the stem stitch is helpful for filling curved shapes because it can hug the curves easier, but that doesn't mean you can't use it for other shapes too.
How to embroider the stem stitch:
Full video tutorial.


To start, bring the needle up through the fabric at the start of the line.
Go back down through the fabric about ¼ an inch away along the line. Do not tug the thread entirely flush with the fabric.
Next, bring the needle back up through the about halfway between the two stitches. Then tug the thread flush with the fabric.
Now, repeat. Bring the needle back down through the fabric about ¼ and inch away along the line, come up between the two points, and tug the thread flush.
To end the line, bring the needle back down into the hole of the last stitch.
When using this as a filling stitch, start each row and coil the stitch in the same direction so that the thread lay close together. If the thread is held to alternating sides, adjusting the side of coil, there will be space between the rows.

4. Couching Stitch + Variations
The basic couching stitch uses one thread to tac down another thread on the front of the fabric. With this stitch you can create all sorts of line work and pattern of tacking stitches. Additionally, couching is also the name of a stitch family. Some of the couching stitch variations within the family would also be good filler stitches.
How to embroider the couching stitch:
Full video tutorial.


To start the couching stitch, you will need two different threads. Bring the first thread up through the fabric at the starting point of the line.
Unthread the needle, keeping the thread loose and do not end it. This is the laid thread.
Thread the needle with the second thread and use this thread to tack down the main thread with small stitches. Come up from one side of the main thread and down on the other side.
Repeat the tacking stitches until the main thread is firmly attached. These can be close, far apart, or a variety of both, depending upon the desired design.
Knot the tacking thread on the back of the fabric. Then re-thread the laid thread on the needle and knot it on the back of the fabric.
When using this as a filling stitch, you can do a single row at a time or curve the laid thread to start the next row, above or below the previous row. Similar to the back stitch, offset the tacking stitches when the rows are close together, otherwise you might create unintended straight lines in your couching with the tacking stitches.

5. Running Stitch
The running stitch creates a line with dashes. It's a great beginner stitch but it can also add dimension to a design to signify movement, such as blowing wind or rushing water. Additionally, this stitch can create decorative patterns when used for sashiko/ running stitch pattern mending. Since this stitch has intentional gaps in its lines, the fill will not be a solid fill, but this can be a great way to add patterning and movement to a more solid shape.
How to embroider the running stitch:
Full video tutorial.


To start, bring the needle up through the fabric at the start of the line.
Go back down through the fabric a short distance from the first point. Then pop the needle back up through the fabric. Move in and out of the fabric with the needle until you can’t anymore, then gently pull the needle through the fabric. The places the needle was shown is now where the thread is, and the fabric is the space between the stitches.
Repeat adding as many stitches as needed.

6. Chain/Reverse Chain Stitch + Variations
The chain stitch and reverse chain stitch both create a line that looks like a chain link bracelet. These two stitches are relatively interchangeable and it's mostly personal preference on which one to use in a design. Personally, I like the reverse chain stitch better because it makes it easer to control the chain links and the positioning of the line. When this stitch is used to fill spaces I think it looks like a cozy sweater and provides a nice snug fill. Just like bracelets, there's a wide variety of chain stitches that create different textures and designs. Try these variations or these variations.
How to embroider the reverse chain stitch:
Full video tutorial.


Start by bringing the needle through your fabric and make a short back stitch.
Next, bring the needle and thread up through the fabric a short distance away from the end of the back stitch.
Now slide the needle underneath the back stitch. Do not go through the fabric.
Pull the needle and thread all the way through and bring the needle back down where the stitch started, making a small chain link.
Leave another space and bring the needle back up through the fabric.
To create the next chain link, slide the needle underneath both strands of the previous link. Then bring the needle back down through the fabric in the same spot it started, closing the link.
Repeat adding chain links for entire length of line.
When using the reverse chain stitch to fill a space, I find it's helpful to slide the needle away from the row previously stitched so that it doesn't snag or get caught.

7. Coral Stitch
The coral stitch creates a knotted line. It can add texture and movement when used as a line and a textural design when used to fill spaces.
How to embroider the coral stitch:
Full video tutorial.


I worked this stitch from right to left. Bring the needle up at the start of the line.
Next, bring the needle in and out of the the fabric catching a tiny bit of the fabric along the line. Make sure the needle is perpendicular to the line.
Wrap the thread that is coming out of the fabric over the needle, then under the needle. Next, gently tug so that the wrapped thread is flush with the fabric.
Now repeat. Move forward to however far apart the next knot will be, then bring the needle in and out of the fabric catching a tiny bit of the fabric along the line. Wrap the thread that is coming out of the fabric over the needle, then under the needle. Next, gently tug so that the wrapped thread is flush with the fabric.
When the line is complete, bring the needle down through the fabric, creating a straight line at the end.

8. Whipped Stitches
Whipped stitches are stitches that have another thread wrapped around them on the front of the fabric. This could be the running stitch, back stitch, chain stitch, and more. If the stitch has individual sections, it can be whipped. No matter what type of stitch is whipped, it's all done the same way.
For this example: the whipped back stitch, builds on the back stitch and wraps another thread around each individual stitch, giving it a candy cane like appearance. This can be great for smoothing out slightly crooked back stitched lines, adding in an additional color, or creating movement.
How to embroider the whipped back stitch:
Full video tutorial.


To start, you'll need a line of back stitches.
Now whip the back stitch. Bring the needle up through the fabric, at the start of the line in the hole of the first back stitch.
Slide the needle underneath the first back stitch. Be sure to only slide under the thread and not stitch through the fabric.
Gently pull the thread so that it is flush with the fabric.
Then slide the needle underneath the next back stitch in the row. Be sure to slide the needle in the same direction so that the whipped thread wraps around the back stitches.
Work down the line of back stitches until the end. At the end of the line, bring the needle back down through the fabric in the hole of the last back stitch.
When using this as a filling stitch, it's easier to whip the rows of back stitches as you go instead of after all of the back stitched rows are stitched.

9. Straight Stitch
The straight stitch creates, you guessed it, straight lines. It is sometimes referred to as a single satin stitch. I like to use this stitch to fill areas and create a dense fill for things such as grass.
How to embroider the straight stitch:
Full video tutorial.


The thread comes up and goes back down through the fabric, creating a straight line.

10. Fan Stitch
The fan stitch is another one of those stitches where the name tells you exactly what it is. This stitch creates a 7 pronged fan shape. The fan stitch can be stacked on top of one another to create thicker decorative lines/boarders, be patterned to fill in spaces, or used as a standalone element. I like using this stitch to create far off desert plants like yuccas.
How to embroider the fan stitch:
Full video tutorial.


The fan stitch is traditionally worked in a grid or diamond pattern.
Start by bringing the needle up in the top left corner of the square. Then bring the needle down in the bottom left corner of the square, creating a straight stitch.
Create the next prong in the fan. Bring the needle up slightly to the right of the previous stitch, along the top of the square. Now bring the needle down through the fabric in the bottom left corner.
Repeat adding the third prong of the fan.
The fourth prong of the fan will start in the right corner of the square.
The fifth and sixth prongs of the fan will start along the right side of the square, slightly below each previous stitch.
The seventh prong of the fan will start in the bottom right corner of the square.
Looking for more helpful embroidery tips, supplies, and hands-on workshops?


Workshops
Join Melissa Galbraith of MCreativeJ for a hands-on workshop! Melissa makes hand embroidery easy with a wide variety of embroidery classes. Classes are beginner-friendly to advanced and will walk you through various stitches, techniques, and designs.


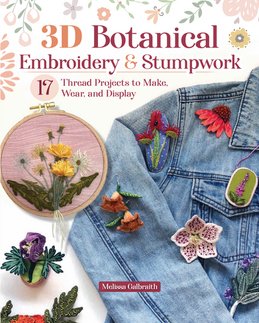
Embroidery Books
Want a great hand embroidery reference? Try one of Melissa's hand embroidery books! Each book is great for beginners and breaks down materials, stitches, techniques, and projects for you.


Embroidery Kits and Supplies
MCreativeJ designs beginner to advanced nature-inspired hand embroidery kits, full of textural stitches. Try some of the stitches listed above and more with all of the supplies provided.


Comments