

10 Knot Stitches That Create Textural Embroidery & How to Make Them
- Melissa Galbraith
- Nov 18, 2025
- 9 min read

Updated: Apr 29

In hand embroidery there are knots to secure your thread, decorative knots for the front of your fabric, and thread tangle knots that can be the bane of your existence from trying to untangle them. (My advice on the thread tangle ones, if you can't untangle them in a few minutes, cut them out, work them into the design, or stitch them into the back.)
Not all knots are great.
While some knots are meant to secure thread, others are meant to add decorative and textural elements to an embroidery. As someone who loves to add texture to their stitching, knots are one of my favorite types of stitches to add to a piece. From filling spaces to adding dashes of texture or creating playful elements, knots can be playful additions.
10 Knot Stitches for Textural Hand Embroidery and How to Create Them
In this round up, you'll learn 10 hand embroidery knots or stitches that include some kind of knot in them to create texture. Try the bullion knot, colonial knot, coral stitch, Danish knot, four-legged knot, French knot, oyster stitch, Palestrina stitch, Peking knot, and pistil stitch.

Bullion knot
The bullion knot is a long skinny knot that looks kind of like a worm. It can be used to fill spaces, add texture, or even make flowers.
How to stitch the bullion knot:
Bring the needle up through the fabric where the bullion knot will start.
Bring the needle back down through the fabric and slide the needle towards where the thread is coming out of the fabric so that the needle is resting in the fabric. This length will determine how long the bullion knot is.
Wrap the thread coming out of the fabric around the pointed end of the needle. Make sure the wraps are taught around the needle and do not overlap.
Pinch the wrap and gently pull the needle so that the wrap slides along the thread. The wrapped thread should be taught, so this might take a little wiggling. With the wrapped thread off the needle, gently pull the thread coming out of the fabric so that the wrapped thread (the knot) is in line with the point where the thread is coming out of the fabric.
Push the wrapped thread flush with the fabric. Then pull the thread towards the other side of the knot, bringing the wraps flush with the fabric.
Finally, bring the needle back down through the fabric where the needle was brought down in step 2, to secure the bullion knot in place.
Colonial knot
The Colonial Knot creates a rounded raised knot of the front of the fabric. It's similar to the French knot, but created differently. I personally think they're interchangeable, but other stitchers have strong feelings on French vs. Colonial knots. I'll let you be the judge.
How to stitch the colonial knot:
Start by bringing the needle up through the fabric at the center of the knot.
Twist the thread coming out of the fabric so that it creates a crossed loop.
Place the needle in the loop, going front right to left.
Next, wrap the working thread around the needle.
Then bring the needle back through the fabric. Before pushing the needle all the way through the fabric, gently tug the wrapped thread so that it is tightly wrapped around the needle and flush with the fabric. Once it is tight and flush, push the needle all the way through the fabric. If the thread is loose or loopy- this will create a loose and loopy knot. This creates one colonial knot.
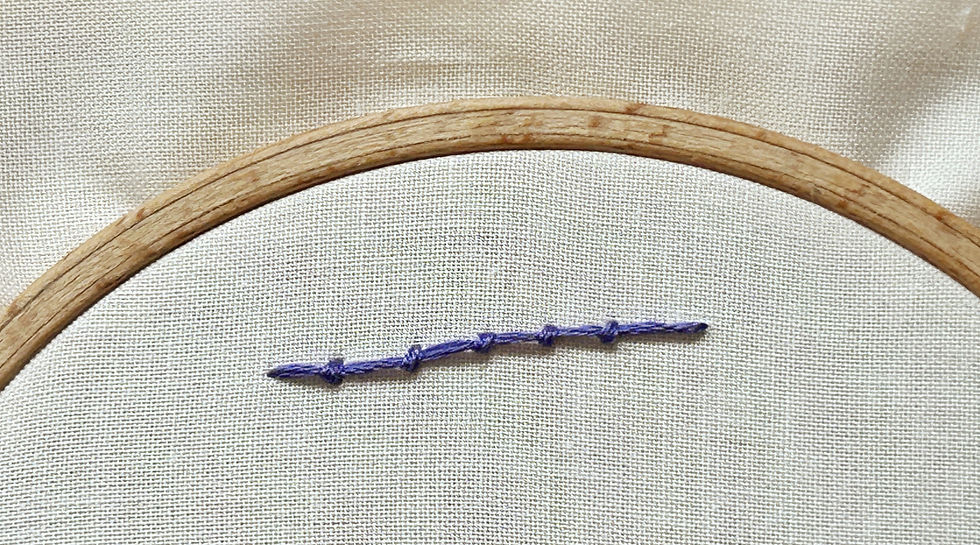
Coral stitch
The coral stitch creates a line with small knots along it. While not technically a knot, this stitch has knot it in. The coral stitch can be used for line work or filling spaces, making it a versatile stitch.
How to stitch the coral stitch:
I worked this stitch from right to left. Bring the needle up at the start of the line.
Next, bring the needle in and out of the fabric catching a tiny bit of the fabric along the line. Make sure the needle is perpendicular to the line.
Wrap the thread that is coming out of the fabric over the needle, then under the needle.
Next, gently tug so that the wrapped thread is flush with the fabric.
Now repeat. Move forward to however far apart the next knot will be, then bring the needle in and out of the the fabric catching a tiny bit of the fabric along the line.
Wrap the thread that is coming out of the fabric over the needle, then under the needle.
Next, gently tug so that the wrapped thread is flush with the fabric.
When the line is complete, bring the needle down through the fabric, creating a straight line at the end.

Danish knot
The Danish Knot creates a raised triangular knot on the front of the fabric. The Danish knot got its name because it became popular due to Danish hobbyists. I've used this knot to fill spaces, as flower centers, and create rocks in landscapes.
How to stitch the Danish knot:
Start by bringing the needle up through the fabric at the top point of the triangle.
Bring the needle back down through the fabric at the bottom right corner of the triangle, making a straight stitch.
Next, bring the needle up through the fabric in the bottom left corner of the triangle.
Slide the needle under the straight stitch with the tip pointed towards the bottom left corner. Gently pull the thread so that it wraps around the straight stitch.
Slide the needle under the straight stitch again, with the tip of the needle pointed towards the bottom left corner. This time, the tip of the needle should go over the thread coming out of the fabric. Again, gently tug the thread so that it is flush with the fabric.
To end the Danish knot, bring the needle back down through the fabric in the bottom left corner of the triangle. This creates one Danish knot.
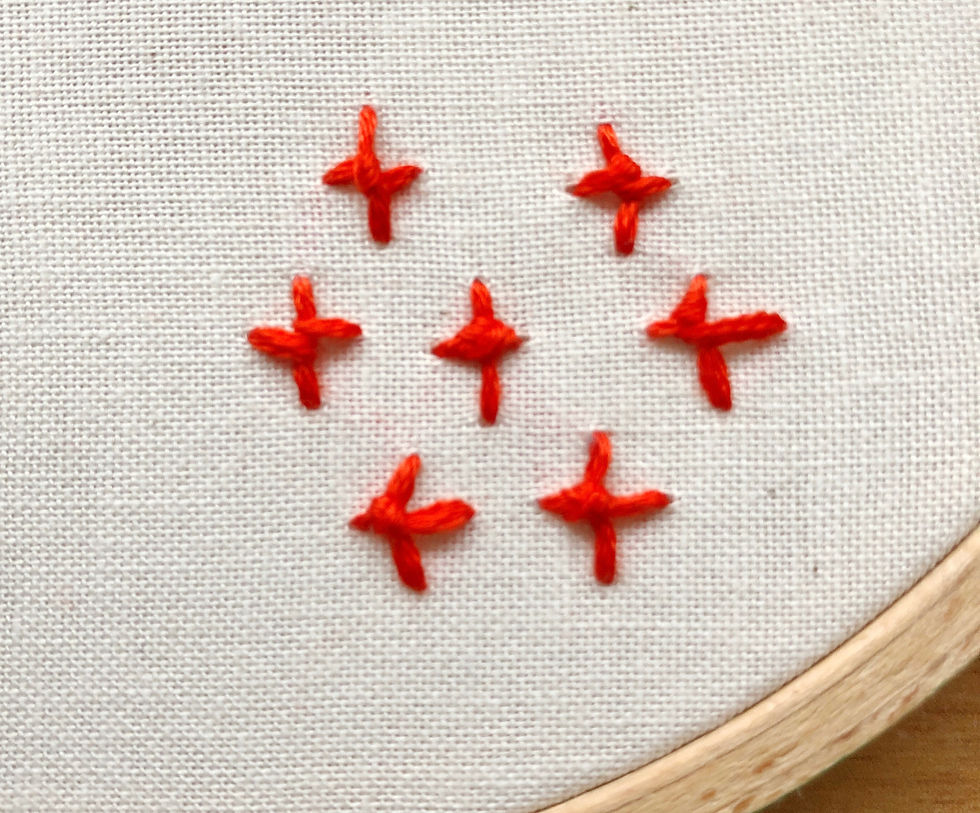
Four-legged knot
The four-legged knot looks like a plus sign with a knot in the center. It's slightly raised center adds a dash of texture. I recently used this stitch to create overlapping hydrangea petals, and I could also see it great as stars, far off flowers, starfish, and more.
How to stitch the four-legged knot:
To start, make a vertical stitch.
Next, bring the needle up parallel to the center of the vertical stitch and a short distance away. This will be the start of the crossed bar of the four-legged knot.
Lay the thread horizontally across the vertical stitch.
Next, coming from the same direction the thread is coming out of the fabric, bring the needle under the vertical stitch and over the thread laying horizontally. Gently tug so that the wrapped thread is flush with the fabric.
Then bring the needle back down into the fabric, complete the horizontal line.

French knot
French knots create a round raised knot on the front of the fabric. As I mentioned earlier, they're similar to colonial knots, but created differently. French knots can be altered in size based on how many times the thread is wrapped around the needle and how many strands of thread is used. The more strands of thread used, the wider the knot will be, like getting a larger sized pizza. The more wraps around the needle the taller the knot will be, like adding another patty to a burger.
How to stitch the French knot:
To start, bring the needle from the back of your fabric to the front. Lay the hoop flat on the table in front.
Hold the needle in the dominant hand. In the opposite hand, pinch the thread about 4 inches away from the fabric.
In between where the thread in pinched and coming out of the fabric, wrap the thread around the needle. Tug the wraps tightly around the needle, leaving the wraps on the needle.
Bring the needle point back down into the fabric next to where the thread is coming out of the fabric.
Before pushing the needle through the fabric, make sure the thread is tightly wrapped around the needle and flush with the fabric. If it isn't the knot will be a loops mess.
Push the needle through the fabric and tug until a knot is formed on the front of the fabric.

Oyster stitch
The oyster stitch looks like an oyster in a shell. It has a twisted chain center with an outer chain loop. While it's not technically called a knot, it's twisty like a knot, so I'm including it in this collection.
How to stitch the oyster stitch:
To start, bring the needle and thread up from the back of the fabric to the front.
Next, bring the needle back down through the fabric next to where you just came up and then pop the needle up through the fabric pointed towards to end of the oyster stitch.
With the needle now in and out of the fabric, wrap the working thread across the needle and then around the top.
Next, gently pull the needle through the fabric, making a twisted loop.
Next, bring the needle underneath the right side of the twisted loop. Gently pull the thread through the fabric til you have a small loop on the right side of the twisted loop.
Next, bring the needle back down through the fabric, next to the outer edge of the twisted loop and the inside of the loop you just created. This will create a loop around the twisted loop.
Next, bring your needle up through the fabric at the top of the twisted loop, inside the loop you just created.
Gently tug so that the outer loop is flush with the twisted loop.
Now make a small stitch on the other side of the outer loop, tacking it down to the fabric.

Palestrina stitch
The Palestrina stitch is a knotted line. This knot is somewhat similar to the Danish knot, but connected in a row. This would make a great boarder or filling stitch.
How to stitch the Palestrina stitch:
Bring the needle up through the at the start of the line.
Move forward along the line to where the knot will be. Bring the needle into the fabric and pop it back up, slightly below. Pull the needle through the fabric, creating a straight line.
Next, slide the needle underneath the straight line, with the needle going towards where the thread is coming out of the fabric. Tug gently so that the thread is flush with the fabric.
Slide the needle underneath the straight thread again, angling the needle behind where the thread is coming out of the fabric and over the working thread. Tug gently to create a knot.
Now move on to the next knot in the row, starting these steps again.
To finish the Palestrina stitch, bring the needle back down through the fabric after the last knot in the row is complete.

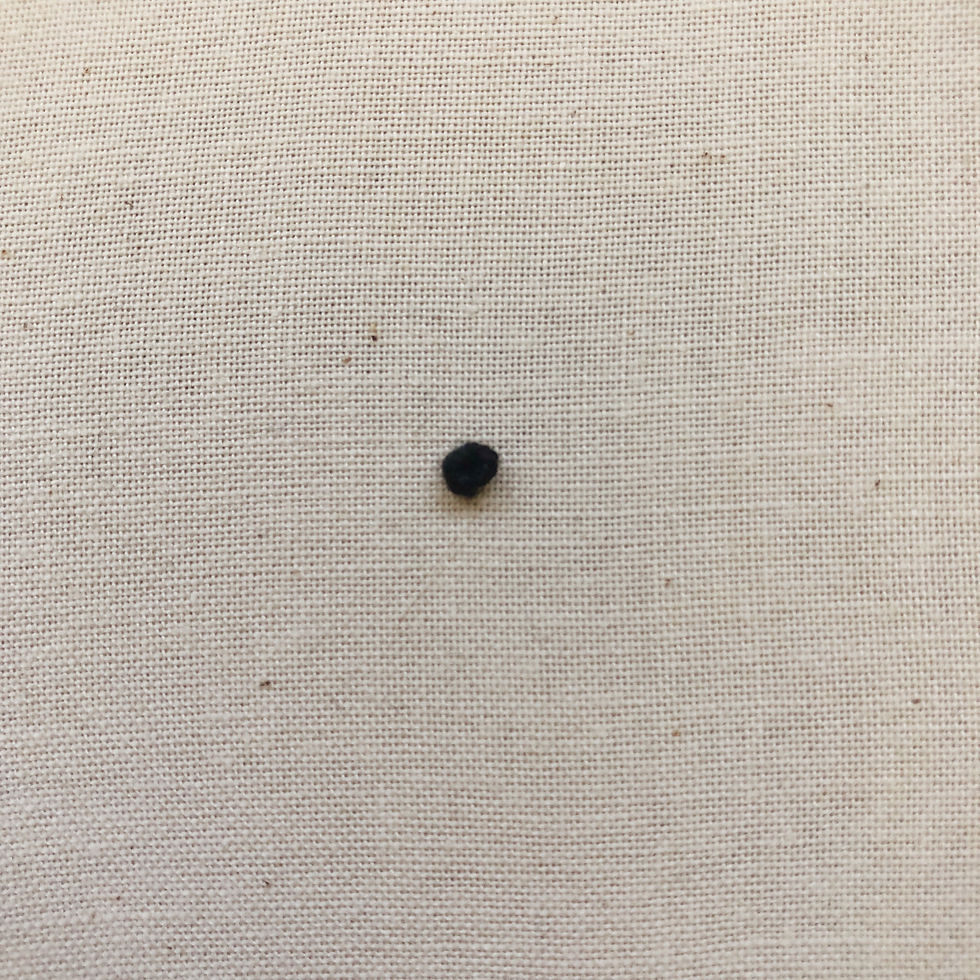
Peking knot
The Peking knot is a loop-like knot that is tacked to the fabric at the base. This stitch is also called the Chinese knot or forbidden stitch. It's named after Peking (now Beijing) because it was used for embroidery made for the imperial court in the city's Forbidden City.
How to stitch the peking knot:
Bring the needle up from the back of the fabric at the base of the knot.
Cross the thread over itself to create a loop. The working thread should be on the back of the loop.
Cinch the loop down towards the fabric, creating the size loop desired for this stitch.
Create a short stitch over the crossed thread. Be sure to NOT go back down in the same spot, otherwise the loop will disappear. This creates one Peking knot.

Pistil stitch
The pistil stitch is a line with a knot at the end. I like to think of it as a long tailed French knot. This stitch is a fun one because the length of the straight stitch can be adjusted from stitch to stitch. I've used this stitch for flower stamens, flowers, fireworks, snowflakes, antenna and more.
How to stitch the pistil:
To create the pistil stitch, bring the needle up through the fabric, from the back to the front, at the bottom point of the straight line.
Pinch the thread in the non-dominant hand about 4 inches from where the thread comes out of the front of the fabric.
In between where the thread is pinched and it is coming out of the fabric, wrap the thread around the needle. The more times the thread is wrapped, the larger the knot will be.
After the thread is wrapped, bring the needle back down through the fabric at the top point of the pistil stitch. Before pushing the needle all the way through the fabric, gently tug the thread so that it is tightly wrapped around the needle and flush with the fabric. This creates one pistil stitch.
Looking for more helpful embroidery tips, supplies, and hands-on workshops?


Workshops
Join Melissa Galbraith of MCreativeJ for a hands-on workshop! Melissa makes hand embroidery easy with a wide variety of embroidery classes. Classes are beginner-friendly to advanced and will walk you through various stitches, techniques, and designs.


Embroidery Books
Want a great hand embroidery reference? Try one of Melissa's hand embroidery books! Each book is great for beginners and breaks down materials, stitches, techniques, and projects for you.


Comments